
Please note: to use the Facebook integration with SuperControl you must have more that 2000 likes – this is a rule set by Facebook.
This is the final article in the series about top tips to boost your marketing on social media. If you haven’t had the chance to read them yet, here’s the first 2 posts: Save money and reach more travellers by targeting your Facebook posts and Target your guest database directly using Facebook.
Using data from your self-catering website allows you to target guests who have been searching your property already and turn those views into reservations!
Another function within Facebook audiences is Remarketing. This useful piece of tracking software is embedded into your website code and sends data back to Facebook about the guests browsing your site, what they’re looking at and where they’re dropping off your website. You can then target these people using Facebook ads tailored to their behaviour on your website. For example, if people have dropped off your site after checking the pricing page, you can target these people with an ad offering a 10% discount.
Create a Pixel
The first stage of setting up your website tracking is to create a Facebook pixel and add it to your website.
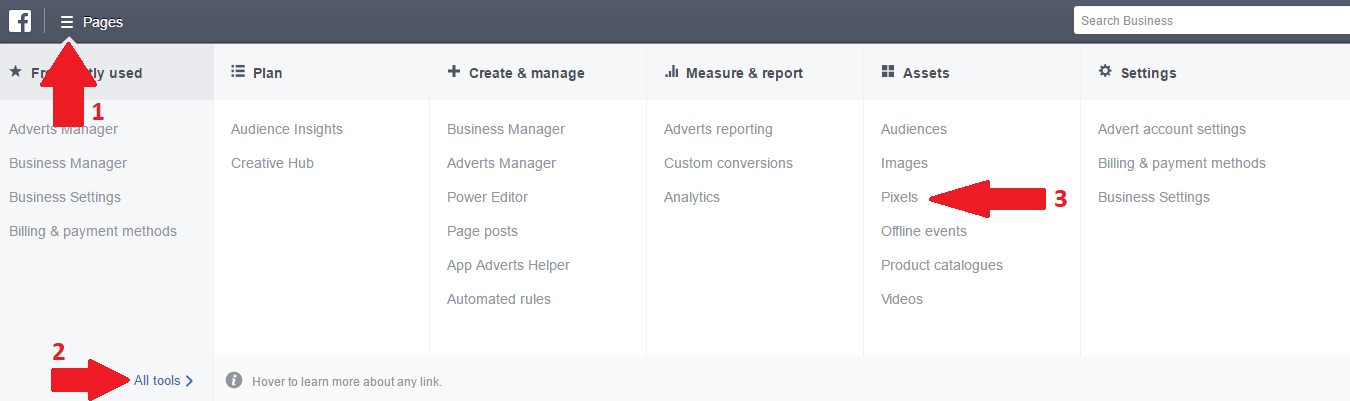
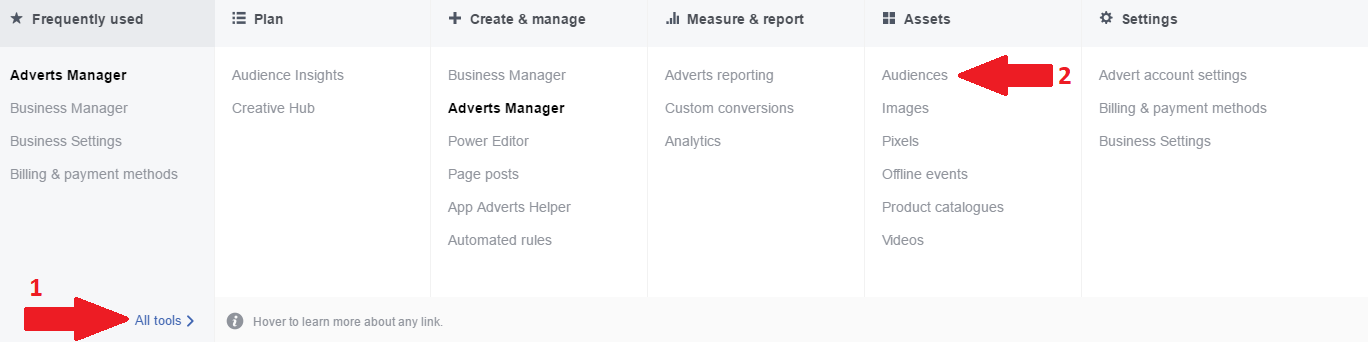
- Click the Business Manager menu in your business manager. Then click All Tools, and in the Measure and report section you’ll see ‘Pixels and conversions’. Click this.

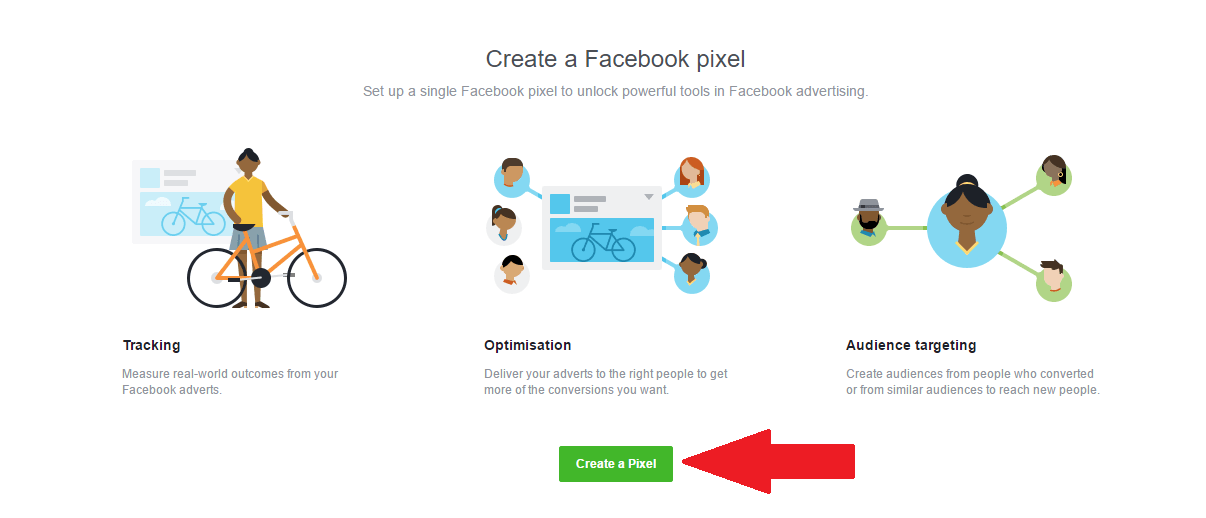
- 2. Select Create Pixel.

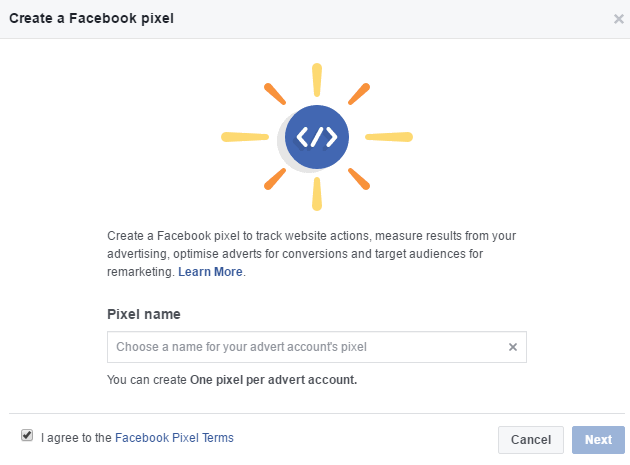
- 3. Type in a name for your Pixel, click and agree to the Terms and Conditions and click Next.

- 4. That’s your Pixel created! Now you have to add it to your website. If you use a web developer, you can send the pixel to them and they should be able to add it for you. If you manage your website yourself, there are detailed instructions here on how to add the pixel to your site.

-
Create an advert
- After adding the pixel to your site, you’ll be all set up to create an advert audience based on your website browsers.

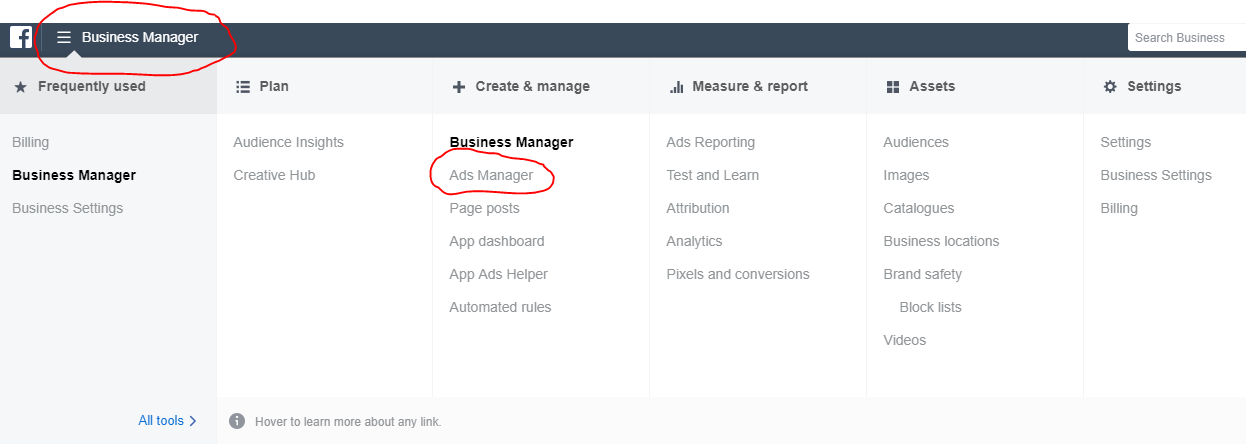
1. Click into your adverts manager:
2. Select All Tools, then in the Assets tab click on Audience:
If you read the second instalment of our Facebook tips and tricks, you’ll have seen how to create a custom audience there based on your guest database. We’ll go through the process again here, but this time based on your web traffic.
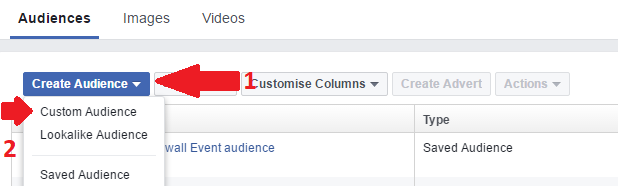
3. Now, click on Create Audience then Custom Audience:
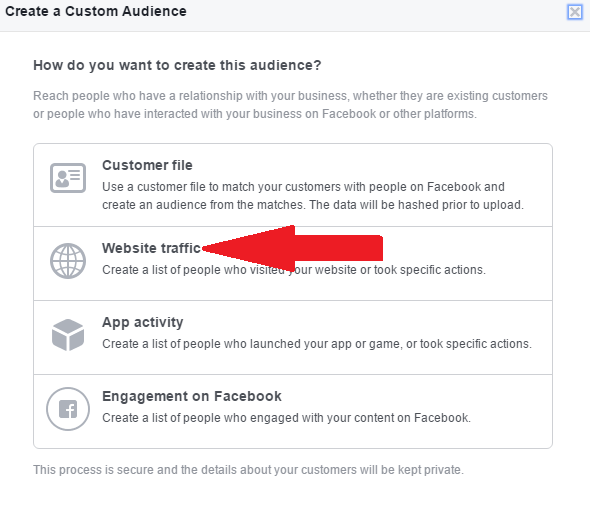
4. You should now see the dialogue box below. Select Website Traffic.
5. Now you can select a variety of options for creating your Audience.
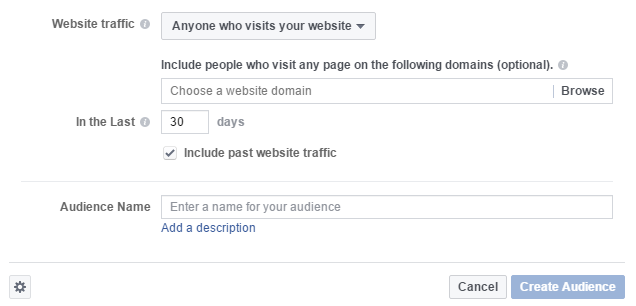
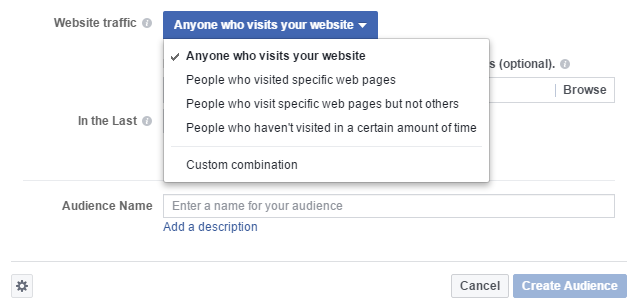
You can choose people who have visited your site and looked at a particular property; people who have looked at your website and who have also looked for other self-catering properties in your area (you can enter website addresses manually) or people who have looked at any page on your site in the last 14 days.
Our advice is to play around – look at as many combinations of audience targeting as you can and test them out to find out what works best for you and your guests. Make sure you use the Facebook insights tool to track what’s working and what’s not. Good luck! Let us know how you get on.


